Friday, November 29, 2013

Henna 2

After making the henna cones, I did some designs on my hands.


Since I don't have more hands, I did some more henna designs/doodles on paper.


Tuesday, November 26, 2013

How to: Henna Cones

As promised...Here is a how to on Henna Cones =)


Here is what you will need

Cellophane Gift Wrap (99 cent store) 
Scissors
Tape
Rubber Bands


Directions


Begin by cutting the cellophane in a rectangular shape. 
( Bigger the rectangle = Bigger the cone) 


1. Take one corner of the cellophane sheet and fold over until tip is at the midpoint of the sheet.

2. Continue to rotate with one hand while the other hand is holding the tip (as in 3.)

3. This is what your hand position should look like (i'm a lefty, so for righties it is the opposite)

4. If the tip is not tight,  pull on the free end of the cellophane to tighten.

5. Once you've done that, the tip should like like this. 

6. Tape the seams of the cone. 

7. Tape all the seams to prevent leakage as in the pic.

8. Now fill your cone with the henna and leave about 2-3 inches empty at the top.
( p.s. to make this easier and less messy pour your henna mixture into a small ziplock bag, cut the tip, and squeeze the mixture into the cone.) 

9. Use a rubber band to tie the top of the cone. 
( As the cone empties, simply roll the rubber band down to make the cone tighter)

ALL DONE! ^.^


To use : Simply cut the tip. 
The less you cut the finer the lines.


Sunday, November 24, 2013

Earrings by Nurun

Guess what?
 I can make earrings! (and trust me so can you!)
 I didn't think I could do, nor did I think it would be this easy. But with some research, reading and practice I did it! 

 These are my very first earrings. =)

Flower Bead (reused from old necklace) + white bead
Bead on wire wrapped around eye pin + glued to plastic rose
Tassels + Gold Wire Wrap


Tuesday, November 19, 2013

DIY Glass Stone Rings!

About a month ago I purchased some glass stones for a small fish bowl. Sadly I never got the fish and was left with a ton of glass stones. What should I do with them I thought... 
So as always I turned to pinterest for some inspiration.While browsing I came across some DIY rings ideas.  
I thought I could try it out with the glass stones. It turned out better than I expected.
Take a look below! ^.^


For this very simple project here is what you'll need:

-Glass Stones ( got mine from 99¢ Store)

- E6000

-Ring Blanks


Directions: 

1. Apply E6000 glue on to the flat area of the ring blank 

2. Put the glass stone on the glued surface. 

3. Let is dry for 24 hrs. 

DONE =) 


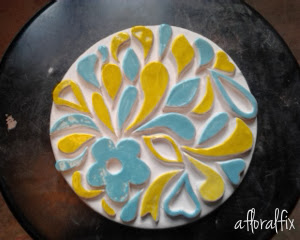
Summer 2013 Pottery

This summer I took a one month pottery class. 
Here are a few pieces that I've made. 


Friday, November 15, 2013

DIY: Safety Pin + Bead Necklace

I've seen a lot of safety pins bracelets on Pinterest. 
I decided to put my own twist on it by making a necklace. 
 (Btw i'm very very new to jewelry making >.<...)
(So if I can do this, trust me so can you!)

Here is the result! 

What you will need:

Directions:

1. Insert safety pins into eye pin.

2. Place round nose plier at the straight end of the eye pin and twist around to make a loop.

3. Should look like this once complete.

4. Use round nose plier to open jump rings.

5. Using the jump ring to connect the chain and safety pins. Repeat on other side.

6. Connect lobster's claw hook to chain via jump ring. 

DONE! 


DIY Glitter Shoes!

Recently (via Pinterest) I came across a post from Le Fanciulle’s blog called “DIY Sparkly Boots”. Click Here to check it out. 
I fell in love with this idea!  I had to give it a try! 
I decided to try this out on a pair of old suede wedges that I rarely wear these days. 
Perhaps a little glitter will persuade me to wear them more often.


What You Will Need: 

Step 1: Place tape around the area to be glittered. 


Step 2: Mix Mod Podge and Glitter. Make sure there is a higher ratio of glitter to mod podge. 
( Clearly i didn't do that when i took the picture but i did add more later)


Step 3: Brush on the mixture evenly.


Step 4: Apply several coats ( I added about 5-6) and let it dry. 


Step 5: Peel the tape off.


DONE! ^.^


Thursday, November 14, 2013

General Tso's Chicken

Two days ago I tried out a recipe for General Tso's Chicken. Click Here for the recipe.
It was delicious and easy! ^.^ 

YUM! ^.^

Sauce Mixture


Green Onions

Dried Peppers
Peas ( my own addition to the recipe)

Fried Chicken


Tuesday, November 12, 2013

Handbuilding Pottery Fall 2012

In the fall of 2012, I took a hand building pottery course. Here are a few pieces that i've made. 

Slab Box Piece

Coil Piece


Multi-chambered Pinch Pot

Pinch Pot

Coil Method-Plate

Pinch Pot 
Tile Piece

Pinch Pot + Rope

Pinch Pot